
Curved Piecing - you either love it, hate it or just avoid it and think someday maybe..
I was a definite avoider - for decades really.
My first exposure to curves was in a sampler quilt - way back when? - it was the early 90’s.
I didn’t love it. I found it tedious and frankly not much fun. It probably didn’t help that my fabric choices were a bit ordinary and uninspiring.
Fast forward many, many hours of stitching and it’s now my happy place.
So what changed?
Well, I suppose it was finding a quilt design that I loved that much that I had to make it - even if it was curved piecing.
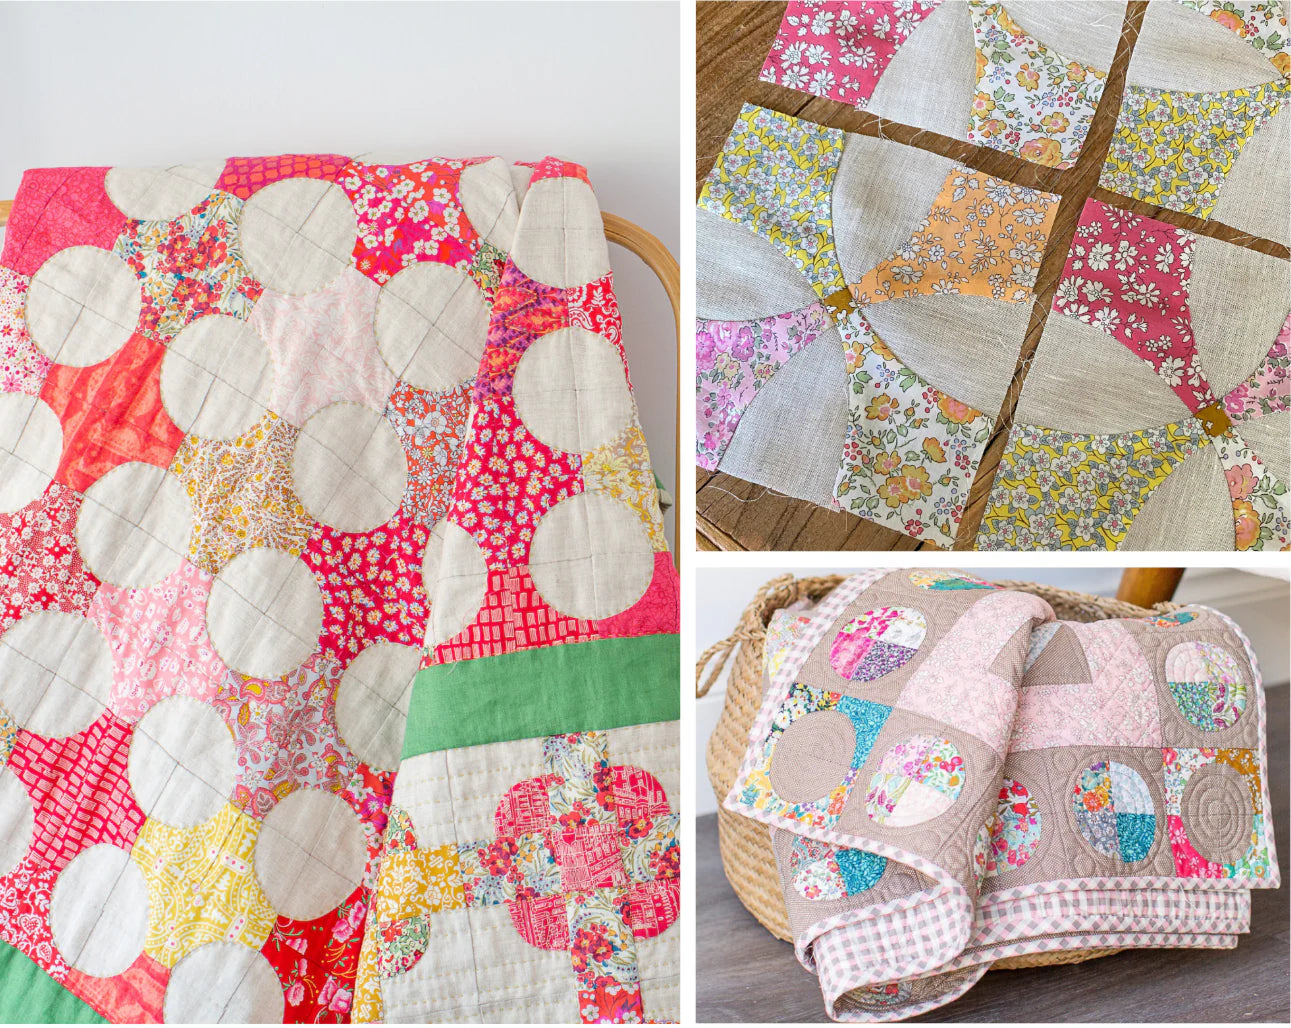
My Flowering Snowball quilt started as a travel project and 168 blocks later, cemented my obsession with curved piecing. It was partly perseverance - you only get good at something if you practice and partly the fact that I’d finally dived into my Liberty stash that I had been collecting for years. I like to think of the quilt as a curation of my Liberty stash at that time. There are so many Liberties that I wish I had more of but I love that I’ve preserved some favourites in the quilt.
I can tell you I was all fingers and thumbs to start with but as the block count grew I relaxed into the stitching and even now find it almost meditative when I’m pinning my fabrics.

So, some tips to make curved piecing easier
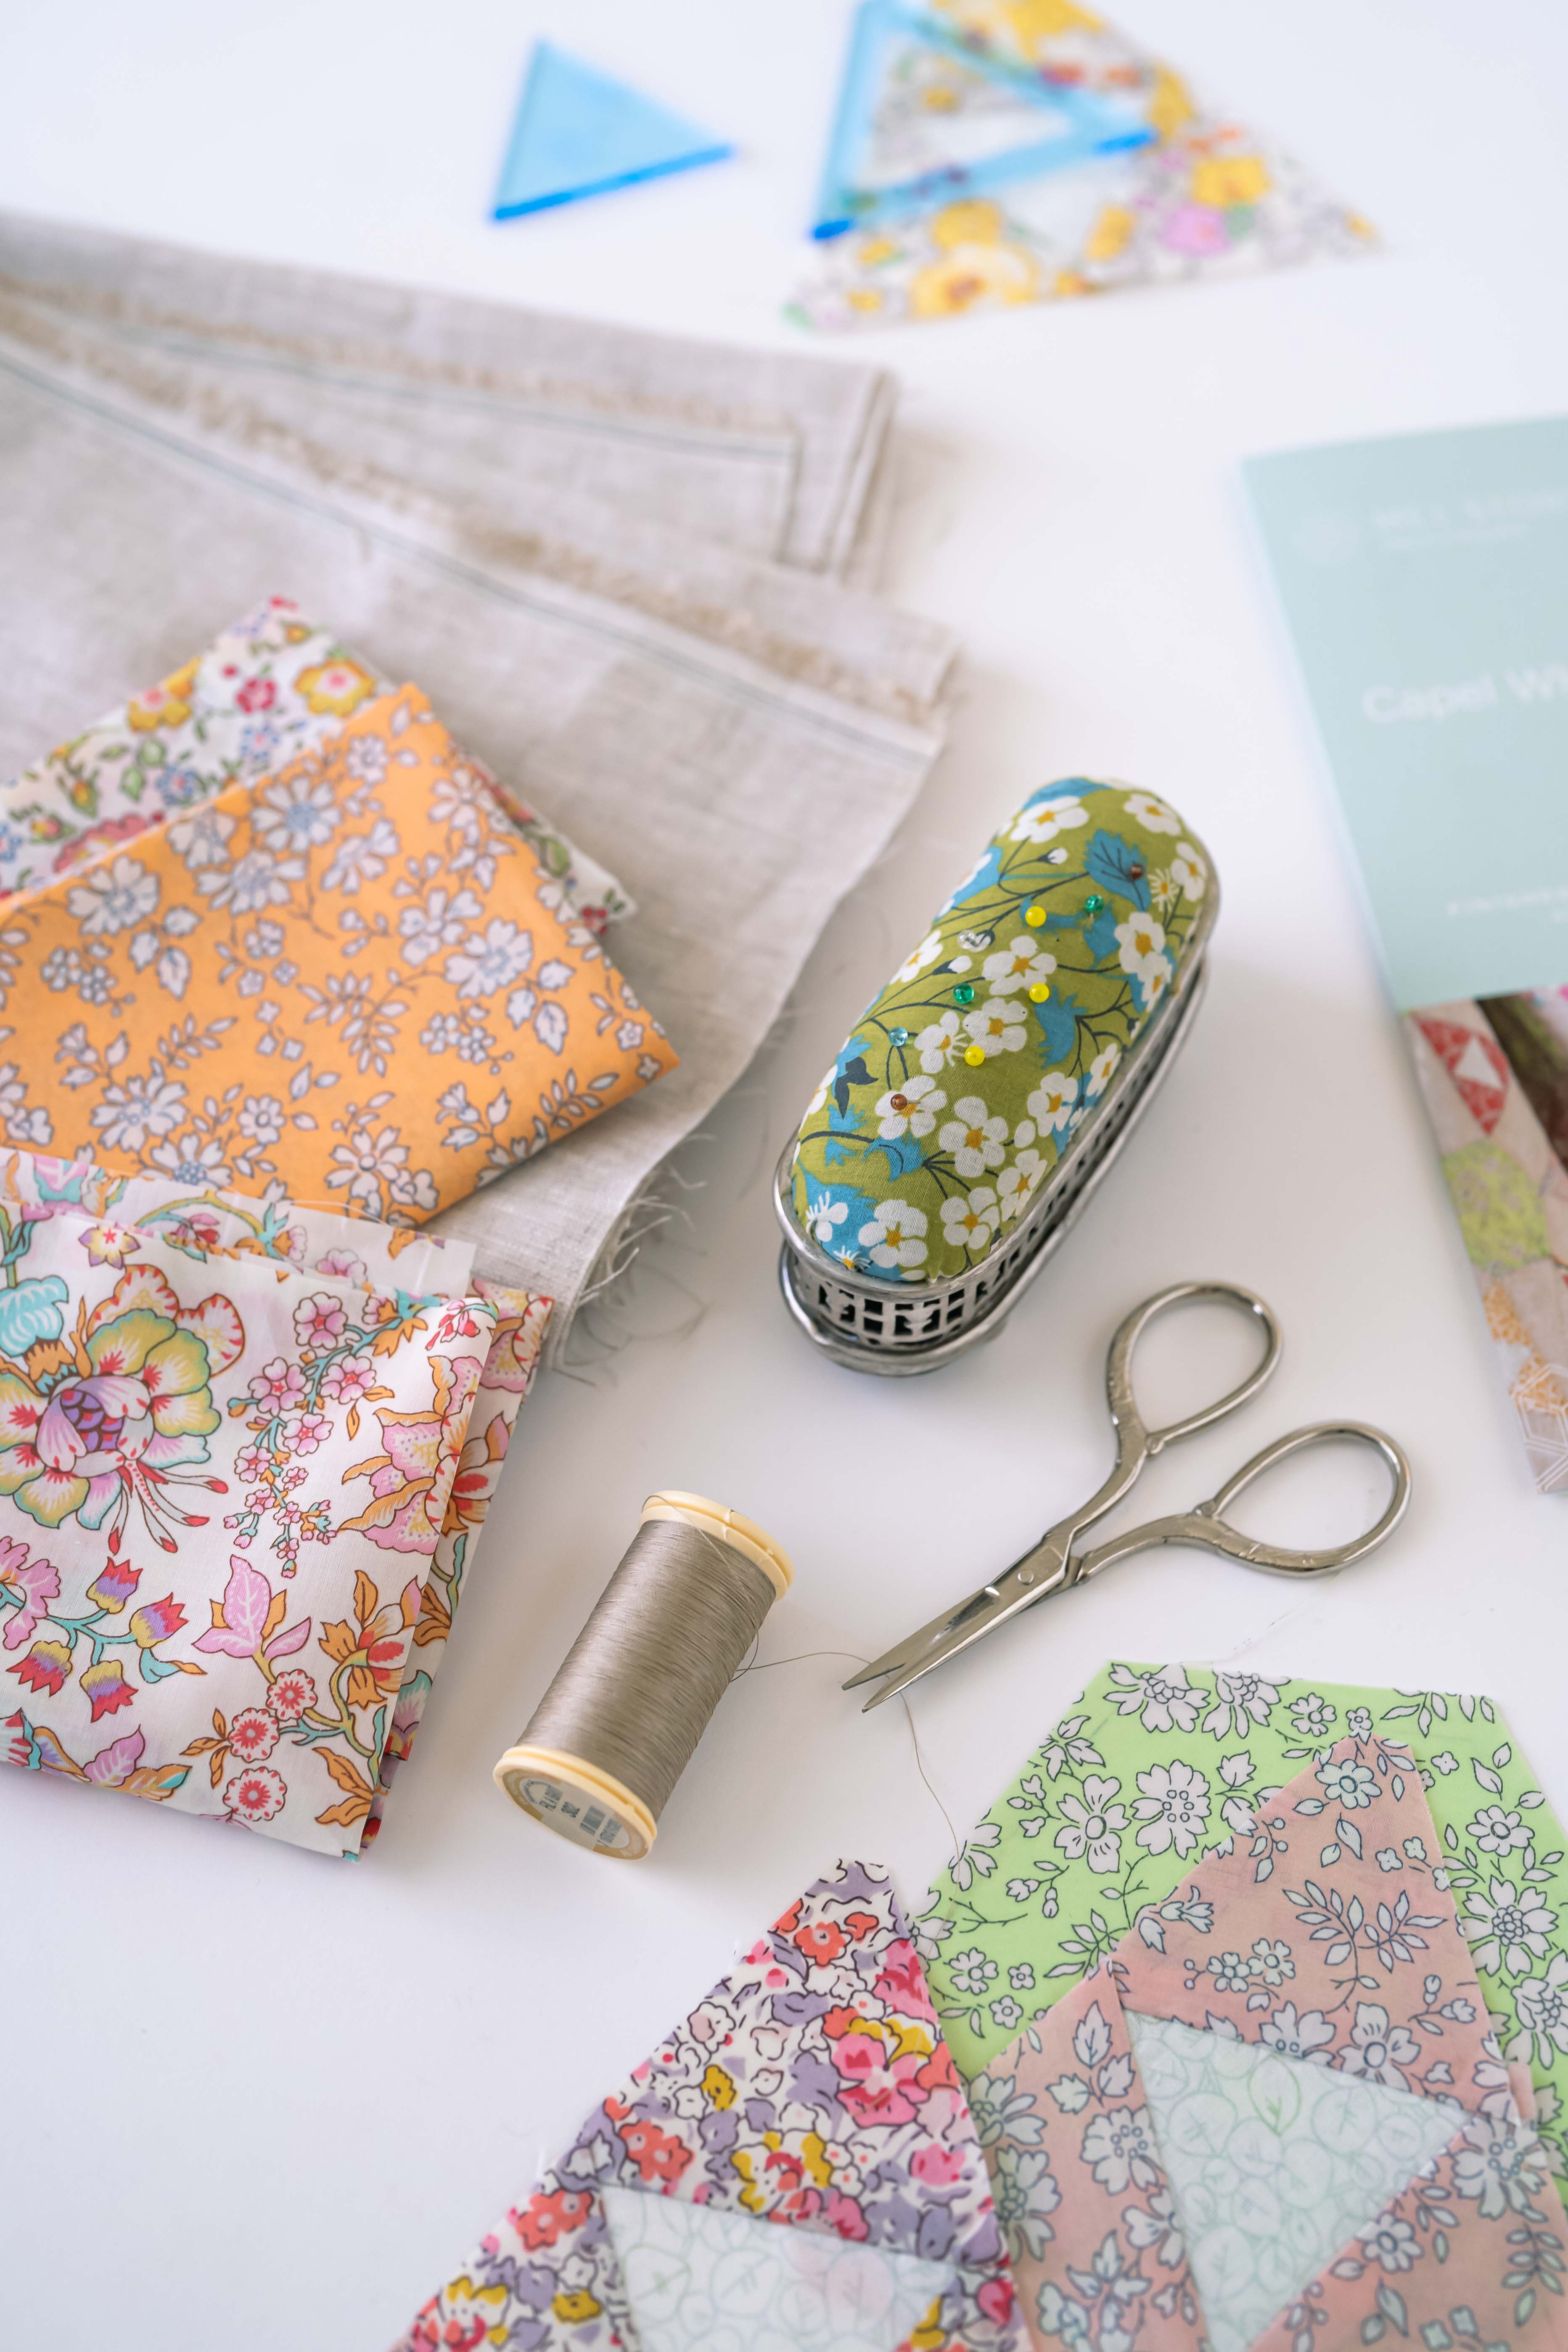
1. Consider the fabric you are usingIf you are new to hand curved piecing - Liberty Tana Lawn is your friend.
A beautifully fine woven cotton fabric with a high thread count, you’ll find it so easy to stitch and with it’s beautiful drape, will be so much happier with the end result.
Although the fabric is strong, it’s softness allows you to ease the fabric, even for the smallest curve without puckering or distorting, resulting in beautifully sewn curves.
The lightweight Linen I use is also fabulous for curved piecing. Although it is a more open weave than Liberty Tana Lawn and behaves a little different because of this - when you use them together the Liberties give a little more structure to your pieces.
You can check out my tips for using Linen in your piecing here.

2. It's all in the pinningThis is my top tip to enjoying curved piecing - it sets you up for success.
I always pin with the concave piece facing me i.e. smiles on top. It allows you to ease the fabric around the curve without puckering. It won’t sit flat when you pin it but it all works out ok once it’s stitched and you turn and press it.
I usually match the centres, pin the ends and depending on the size of the curve add more pins where necessary. For the 2 inch quarter circles in Beaumont Square and Saving Liberty, I’d typically use 5 pins.
If you’d like to see the process, you can watch my mini tutorials here.

3. And the stitching..Take it slow to start, it all will become familiar quickly - I promise, it’s just practice.
Use a fine thread and needle so that it is easier to get small stitches and you will be rewarded with beautifully fluid curves with no stitches visible on top. Changing needle size or thread weight can really make a big difference to your end result.
You can read about my favourite needles and thread here.
4. Also check your tensionSmooth your stitching out as you sew - it’s very easy to gather your fabric.
Too tight stitching - your pieces will appear puckered and won’t sit flat when finished
Too loose stitching - you will see your stitches on the front

How to choose your first curved piecing project?
Regardless of what curves you sew, the process is the same but two factors will determine the level of difficulty - the tightness of the curve and the size of the pieces that you are sewing.
Smaller tighter curves are more challenging than say the slightly bigger more flowing curves for example in the flowering snowball blocks.
Some recommendations
Flowering Snowball QuiltA one block repeat design with a fabulous secondary pattern.
Beautiful gentle curves.
A perfect start to your hand curved piecing journey.

Beaumont Square QuiltA beautiful mix of Linen and Liberty that is a joy to sew
A little more challenging but perfectly achievable with my instructions and mini tutorials to help you along the way.

If you can’t decide..
Go with the project that first caught your eye - because after all, if you love it, you will be more likely to finish it.
I’ve had complete beginners that have never made a quilt before, finish the Beaumont Square quilt and been overjoyed with the result.
What are you waiting for?
Take a look at my mini tutorials on pinning and stitching quarter circles to start you on your way.
Let me know how you go.
Until next time, happy stitching
Mel


Leave a comment